
Dried pressed flowers are a great decorative touch for any home and a great way to treasure your favourite flowers or special flowers you were gifted – perhaps even the flowers from your big day. But how exactly do I go about drying and pressing flowers then? We’ve put together this blog to take you through how to make dried pressed flowers. We’ve included tips on how to pick the best flowers for pressing and then given you a couple of different options for methods to carry out; you can choose regarding the equipment you have available to you, how traditional you want to be, or how long you’re willing for it to take.
How to make dried pressed flowers made simple
The best flowers to choose
How to make dried pressed flowers 101: pick the right flowers to start with. Of course, it’s nice to choose your favourite flowers, or flowers gifted to you for Mother’s Day, Valentine’s day or even gifted to yourself, but there are a few handy tips to keep in mind to ensure you get the best dried pressed flowers you can.
- Choose flowers with flat faces, single petals, or leaves and ferns; daisies are a great example of a flower that works really well to be pressed, meanwhile, larger flowers like roses or tulips should be cut in half or separated to make the best display
- If you’re picking flowers from your garden, pick them on a dry day, in the morning and once all the due has evaporated, to make dried pressed flowers you want them to be as dry as possible others the wet can cause them to mould
- Whether picking flowers or using a bouquet from home, start the process when they are as close to full bloom as possible; drying and pressing them can make the colour fade so you want them to be as vibrant as possible when starting; avoid picking flowers with dark spots or blemishes, or those that are already starting to turn
- Keep your bouquet in the water right up until you’re ready to start to ensure they absorb as much water as possible and avoid turning and recut the stems at an angle for maximum absorption.
To make dried pressed flowers at home, it will often be a process of trial and error, you may perfect it the first time, but likelihood is your first attempt won’t be your best – think of it as an excuse to keep treating yourself to a new bouquet until you perfect it!
The pressing methods
How to make dried pressed flowers using a book…
If you’ve got particularly heavy books lying around your home, using a book is a super easy way to make dried pressed flowers – but they do have to be chunky and heavy books, and don’t use your favourite books in case any water seeps through and causes damage.
You will need:
- Heavy books; either one book and a few heavy items, or three or four heavy books
- Parchment paper / thin cardboard / newspaper / coffee filters / blotting paper
- Tweezers
What to do:
1. Place your paper of choice between the pages this is to absorb any moisture from your flowers
2. Position your flowers face down on the paper, so there is a piece of paper below and above covering both sides of the flower – use one book page per flower
3. Close the book and add extra weight on top to help press the flowers down
4. It can take a while for all the moisture to be absorbed, so wait at least two weeks before checking, consider changing the paper if it’s wet through, and leave for another two weeks, or if all the water has been absorbed, use the tweezers to pick out your flower to avoid damaging it.
How to make dried pressed flowers using an iron…
If waiting two to four weeks seems like a pain to you, then no problem, grab your iron and do it the modern way! Using an iron to make dried pressed flowers is super quick and easy, you’ll have your dried pressed flower display ready in no time.
You will need:
- A heavy book or weight - An iron and ironing board - Parchment paper / thin cardboard / newspaper / coffee filters / blotting paper
- Tweezers
What to do:
1. Firstly, lay your flower or petals between two sheets of paper and flatten with a heavy item
2. Take your paper with the flattened flower still in between and lay on your ironing board
3. Empty the iron so it has no water left in it; the last thing you want to do is add more moisture to your flowers, a turn it on so it heats up – but keep it on a low setting
4. Press the iron down on the upper sheet of paper for ten to fifteen seconds and keep it still
5. Remove the iron for another fifteen seconds so it cools, then repeat the process again until the flower is stiff and dry – use your tweezers to handle it.
How to make dried pressed flowers using the microwave…
Another quick and easy way to make dried pressed flowers is using the microwave – it literally takes seconds and requires no faff! However, ensure your microwave is at a low heat because a high heat can often cause the flowers to turn brown.
You will need:
- A microwave
- Parchment paper / thin cardboard / newspaper / coffee filters / blotting paper
- Two microwaveable plates
- Tweezers
What to do:
1. Start by placing your flowers or petals face down in between two sheets of parchment paper
2. Place the paper on a microwaveable plate and another plate over the top
3. Keep the microwave on a low setting and turn it on for 30 seconds; check on the progress after 30 seconds, and if you’re not happy heat it for another 30 seconds until the flower is stiff and dry
4. Use your tweezers to remove the flowers once you are satisfied.
There are a plethora of ways you can showcase your dried pressed flowers to create decorative displays at home or even create a sentimental gift for a loved one. You can make greeting cards by gluing your dried pressed flowers to the card and you can even make jewellery by setting the flowers in resin; this makes a truly gorgeous memento that are great as earrings or necklaces.
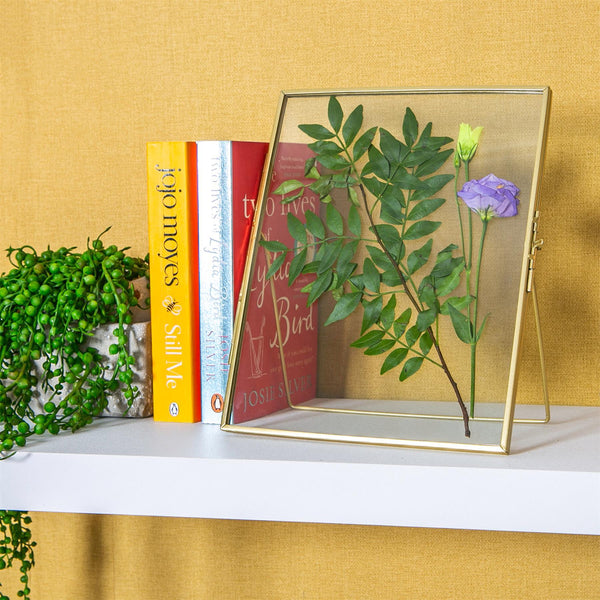
Our favourite way to display dried pressed flowers is by showcasing them in photo frames. You can do this in a multitude of ways by combining them with other flat keepsake items (train tickets, concert tickets etc.,), or your favourite photos, or even by sprinkling glitter or stickers among them. Dried pressed flowers look particularly fantastic in metal frames, but even more so in floating metal frames.
With a selection of sizes available, our floating frames are great to add a shabby chic touch to your dried pressed flowers and really create a statement, giving your treasured flowers, and or items the showcase they deserve. They look great in any room and folding lock design ensures the frame stays firmly closed, securely holding your dried pressed flowers in place.
I hope this has given you an insight, some tips, and easy-to-follow instructions to make dried pressed flowers yourself. Once you’ve created your display of dried pressed flowers, please snap some photos and tag us on Instagram @rinkithome, or use the #rinkit because we’d love to see how they turn out and how you decided to do it!
As always, thanks for reading.
Love, the Rinkit Team.
Lead image credit: @goldennotionsshop